I’ve tried a couple of different methods to incubate and produce Koji. By far my favorite method is -surprise surprise- from Koji Alchemy and involves using an immersion circulator to control temperature and humidity. It is very simple, hands-off and requires minimal manipulation during the 36 hours or so of incubation.

The process, no matter what method you follow, is pretty much the same as long as you know what the goals are. So, if you want to grow Koji and you figure out a different method than either of the ones below that I have tried and it works for you, then go for it. See the images at the end of this post to illustrate some of these steps.
- Soak your grains (I recommend starting with rice, sushi rice in my case but most varieties will work) for about 8 hours in water.
- Steam cook the grains until soft, but not mushy. You should be able to smoosh them between two fingers.
- Place in a perforated container and allow to cool to about 85F – 90F.
- Inoculate with the spores. Sprinkle evenly all over and stir with clean (if possible use latex/nitrile gloves) hands. You need about 1 gram (roughly 0.5 teaspoon) per 1000 grams of cooked grains. I weigh it with a small scale, but no need to do that if you do not have one that can measure such small amount. In that case just use the teaspoon measure.
- Spread the grains to no more than a 2 inch thickness.
- Incubate for 12 hours in a place where you can maintain high humidity and a temperature in the 85F to 95F range at most.
- Remove the tray and with clean hands mix and redistribute the rice. Incubate for another 12 hours.
- Remove the tray again, stir and this time make three long mounds of the rice (like long hills and valleys, where the valleys are about a 0.5 inch thick). Incubate for another 12 hours.
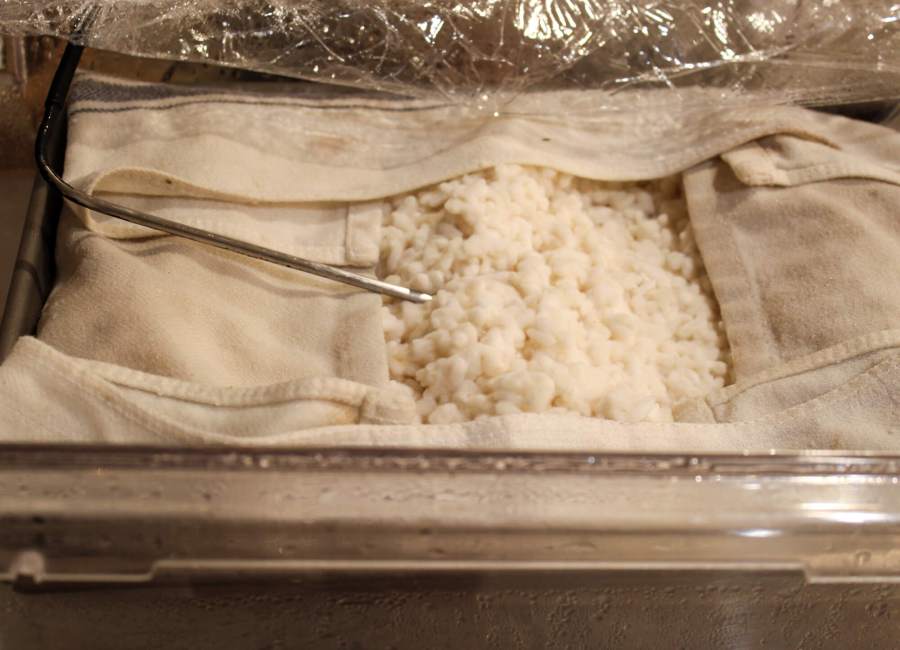
- At the end of 36 hours the Koji should be ready and you should see the grains now very well covered and bound by lots of white (or maybe a little yellow in spots) “mold”. If not, incubate one more time. Keep an eye on it at this point though, too much deep yellow or green could mean it is ready to start sporing and you have gone too far.
- Remove the Koji in pieces. It is now ready to use, store in fridge for a few weeks or vacuum packed and frozen.
- I highly recommend just tasting some like that, raw, before doing anything more. It should taste mildly sweet, clean and savory with a pleasant chew. Then fry a little of it in oil or butter like croutons and taste that as recommended in The Noma Guide to Fermentation. It’s delicious and such a rewarding food product to eat knowing the cool work you put in to produce it.
Strains of Koji spores to use
There are a lot of spore strains that are bred for specific applications. Some emphasize more protein breakdown to produce amino acids (protease enzymes) and others emphasize carbohydrate breakdown into sugars making a sweeter Koji (through Amylase enzymes). There is a whole spectrum in between these two. When I started I only stuck with one strain that seemed to go right down the middle and I have not used any other one since. I might try something else but after reading the following from Koji Alchemy I am less inclined to branch out too much.
“…light rice koji-jin that is specifically customized for short-term fermented foods…works well for every other application. Functionally, growing koji with this one type of spore gives you all the enzymes you need for breaking proteins down into amino acids for depth of flavor.” The specific one I am using is from Amazon and you can find it (for now) at this link.

Rules for Koji incubation
Aspergillus needs to be warm but not more than 90F or so and it loves humidity, around 70 to 75%. Like any project dealing with live cultures, keep things clean and avoid cross-contamination. Although I have not found a need to be too proscriptive with this. Just clean your counters, use clean cotton towels, wear gloves if you have them when mixing the grains with the spores. That’s about it.
You can have all kinds of setups to help control both. This is not like making sourdough starter. You cannot just leave it on the counter and expect to make good living koji. On the other hand you also do not need fancy expensive setups. Although, like any hobby you can go crazy with this stuff too and make a humidity and temperature controlled chamber. The two methods I tried are the “insulated cooler method” and the “water bath (immersion circulator) method“. As I mentioned above, I prefer the immersion circulator method both for it’s ease, control and excellent result.
Insulated cooler method
For the insulated cooler method you need an insulated cooler like a large Igloo one, a perforated pan or maybe large colander to hold the Koji rice, a clean cotton kitchen towel, a heating pad, a thermometer and an open container where you can put warm water to help control temperature and humidity.

- The grains are incubated in the cloth-lined perforated pan and is placed on the heating pad in the cooler with a thermometer stuck in the grains to monitor.
- You need to keep an eye on the temperature, turn the pad off and on occasionally if the grains temperature starts rising above 90F or below 80F.
- Place the open container (I used a bowl) next to the grains in the cooler and refill it with warm water to help with humidity control every so often.
Water bath (immersion circulator) method

For the immersion circulator method you would only need a shallow pan to hold the Koji rice, a cotton kitchen towel, a thermometer and a container large enough to hold the pan. You do not want to have the Koji touching the water, you want it right above it. So, the large container has to be the right size where the Koji pan is just large enough to sit snuggly in the water container right above the water line. If not, then you would need something to raise it, like a few jars that go in the water and the pan goes on top of those (that jar method is what they use in Koji Alchemy)
- The grains are incubated in the cloth-lined baking pan and is placed in the water filled bath but NOT touching the water with a thermometer stuck in the grains to monitor. No need to use a perforated one here, but it is ok of that’s what you have. I used what is known in the US as a 1/4 sheet pan (about 9 X 12 inches).
- Using the immersion circulator, maintain a water temperature high enough to keep the grain bed in the desired range. This means the water usually should be hotter than the target grain temperature. I find 90F to 95F is good.
- Cover the water bath with plastic wrap to limit evaporation. This is it, very simple and effective.

Process Images for a Rice-Wheat Koji


I’ll make sure to check back here if I ever decide to make this myself!